Yes, YouTube Studio lets you schedule a Short natively by choosing Schedule in the Visibility step and setting a date, time and time zone. You don’t need a separate scheduling tool to publish it later.
You’ve finished a stream, pulled out the clips worth keeping, and finally have a backlog ready to publish. Posting everything immediately would empty that backlog before your next broadcast, but manually publishing while you’re live isn’t much better.
Learning how to schedule Shorts on YouTube solves the publishing problem. Finding out whether a particular release window improves results takes a different process, one that separates timing from the quality of the clip itself.
Table of Contents
- Schedule a Short in YouTube Studio Step by Step
- Choose Between YouTube Studio and Third-Party Scheduling
- How Often to Post Without Burning Out
- Measure Scheduled Shorts With Engaged Views
- Find Your Best Publish Windows With a Controlled Test
- Fix Scheduled Shorts That Underperform
- Set Up Your Next Two Weeks of Shorts
Schedule a Short in YouTube Studio Step by Step
Start with YouTube Studio if you’re scheduling directly to your channel. The native route keeps the upload, publication settings and final verification in the same place.
YouTube’s scheduling instructions explain that you can set a future publication date and time, with the video remaining private until its scheduled release.
Upload and set the release
-
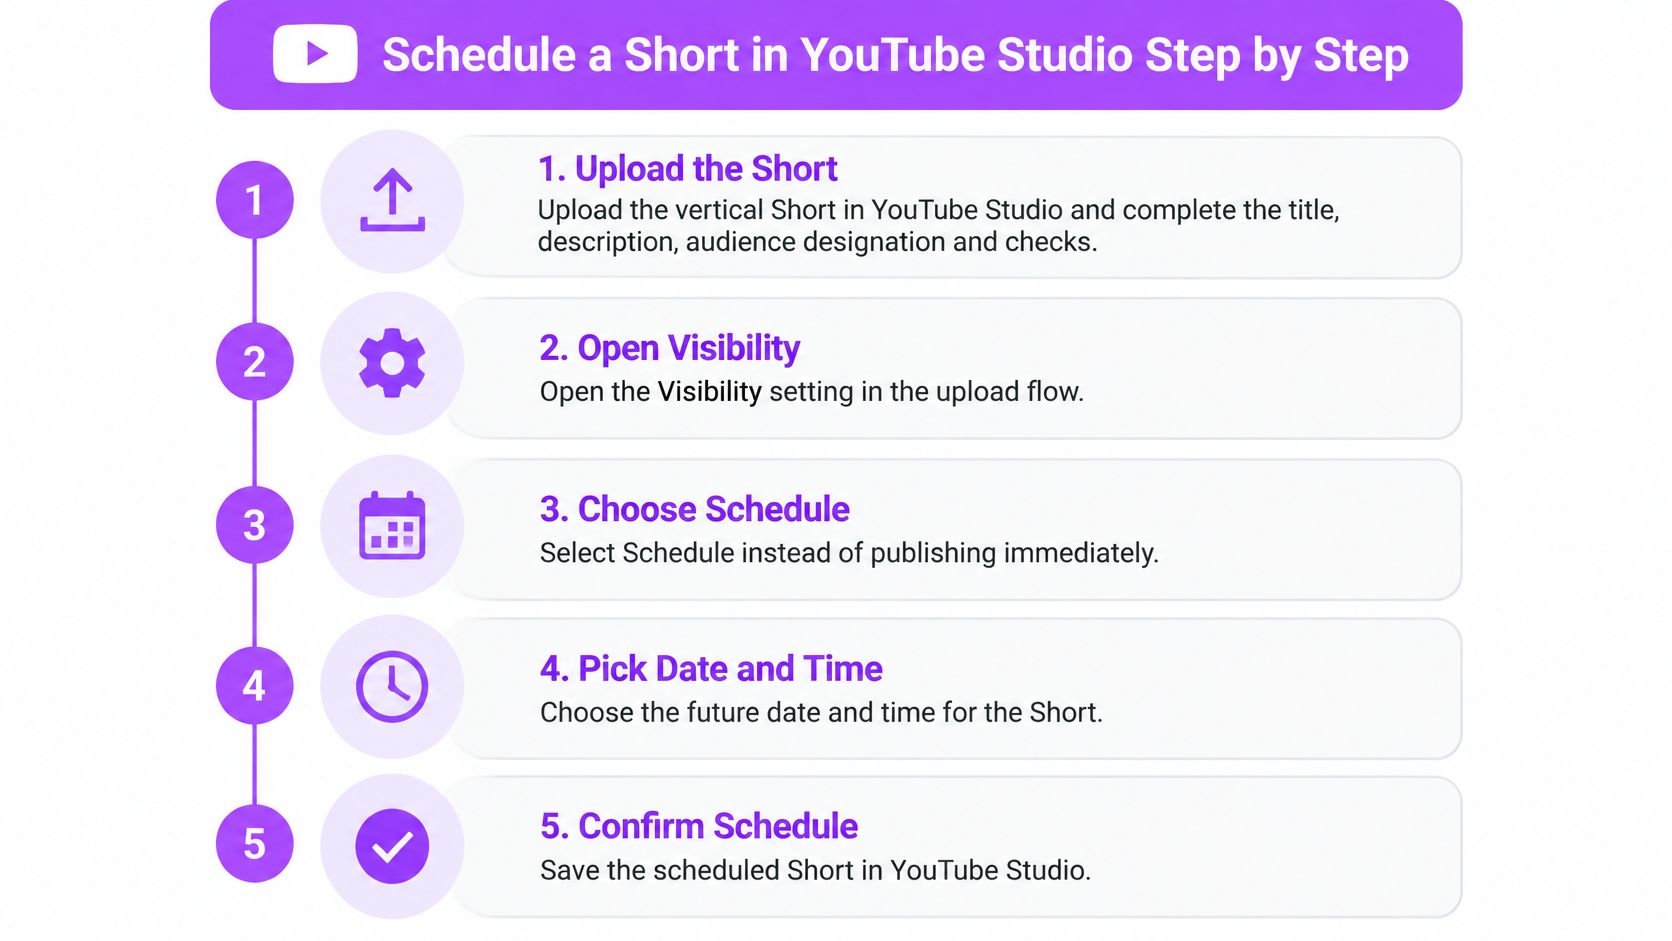
Upload the finished Short. Sign in to YouTube Studio, select Create, then Upload videos, and choose your vertical or square file. Play the final export before uploading so you don’t accidentally queue a version with missing captions, misplaced gameplay or unfinished audio.
-
Complete the details and checks. Enter the title, description and audience designation, then work through the upload checks. Scheduling shouldn’t become a substitute for reviewing the actual clip and its settings.
-
Open Visibility and choose Schedule. Select Schedule rather than publishing immediately. This is the point where you turn an uploaded file into a future release.
-
Set the date, time and time zone. Check the zone explicitly instead of assuming it matches your computer or your audience. A correct clock time attached to the wrong zone still produces the wrong release.
-
Save and verify under Content. Confirm the schedule, then find the item in YouTube Studio’s Content tab. Open its settings and verify the saved publication details before leaving the queue unattended.
Use this visual checklist while you work through the upload flow.
Check the queue as a calendar
For example, suppose a streamer finishes a Tuesday broadcast and uploads four clips that night. They schedule them for Wednesday, Thursday, Saturday and Sunday at 6 pm in the channel’s intended time zone. Those are hypothetical calendar choices, not recommended posting benchmarks.
Review the batch by publication date, not just by filename. Similar-looking clips are easy to confuse, especially when several exports come from the same match or conversation.
A correctly scheduled Short has a dated entry you can reopen and inspect, and it stays private until release. Don’t consider the task finished merely because the upload completed. The final check is whether the saved queue matches the calendar you intended.
Choose Between YouTube Studio and Third-Party Scheduling
Scheduling options compared
| Option | Platforms covered | Where the queue lives | Best for |
|---|---|---|---|
| YouTube Studio scheduler | YouTube only | YouTube Studio Content tab | One channel with a few Shorts a week |
| StreamGen Auto Posting | YouTube Shorts, TikTok, Instagram Reels | StreamGen workspace | One stream producing clips for several platforms |
| Manual upload on the day | Any platform you upload to | Your own files and calendar | One-off clips with no set cadence |
The decision isn’t whether a scheduler sounds more professional. It’s whether you’re repeating the same publishing work across platforms.
YouTube Studio is enough when YouTube is your only destination and you can comfortably handle each upload inside the channel. There’s no additional account connection to maintain, and you can inspect the publication settings where the video will live.
When a central queue earns its place
Our Auto Posting connects YouTube Shorts, TikTok and Instagram Reels, schedules a content queue, and publishes directly without downloading files. After channels are connected once, a full content queue can be scheduled and published from the same workspace.
That removes repeated file handling, but it introduces a dependency on the tool’s publishing flow. You also have another account connection to manage. Before letting a cross-platform queue run, check the selected destination accounts and confirm that each platform’s scheduled time matches the audience you intend to reach.
Manual publishing still makes sense for a timely reaction or an announcement that needs a final approval. It’s a weaker default for evergreen stream clips because you have to interrupt whatever you’re doing when publication time arrives.
Decision rule: Schedule natively when you publish only to YouTube. Consider a central queue when the same broadcast supplies multiple networks and repeated uploads have become the bottleneck.
Don’t change tools to fix weak clips. Choose the route that removes unnecessary publishing work without making the queue harder to verify.
How Often to Post Without Burning Out
Suppose a long stream gives you a backlog of usable clips. You could release the whole batch immediately, or distribute it across the coming weeks while you prepare fresh material. Choose the cadence you can sustain, not the frequency your best production day makes possible.
A calendar helps you see whether the backlog covers your planned releases.
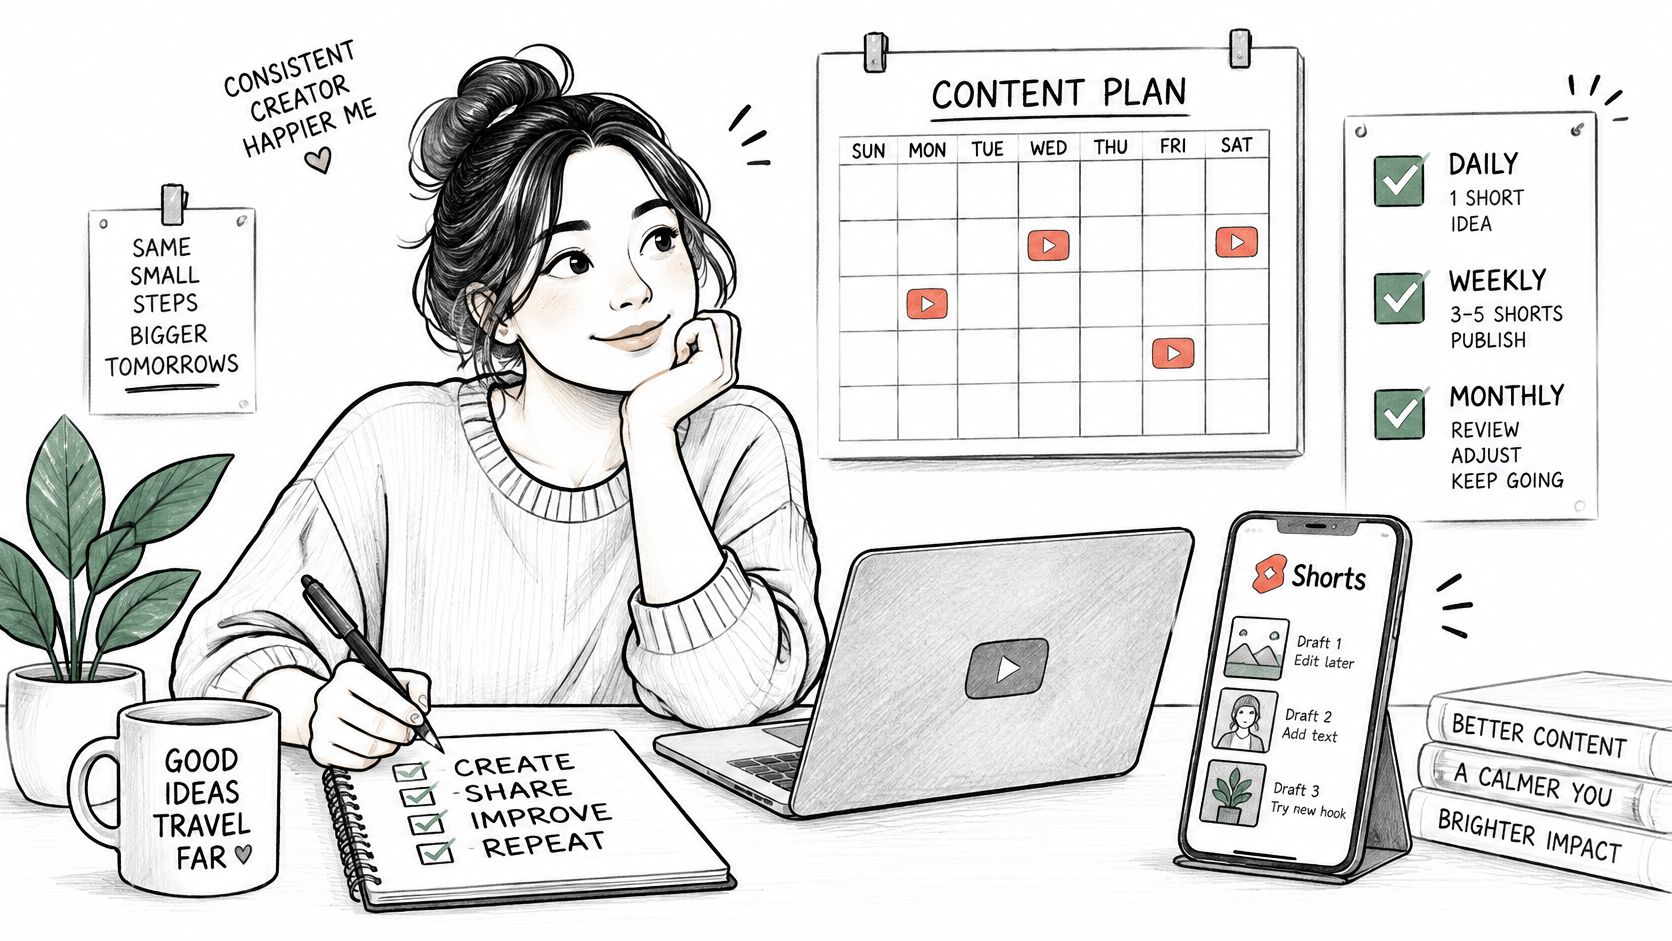
YouTube’s Shorts upload-schedule guidance asks creators to consider publishing frequency, consistency and a repeatable structure, then plan releases for the coming weeks or months. That’s an operational recommendation, not a reason to fill every available calendar slot.
Build around your slower weeks
Set your baseline using the weeks when editing takes longer or your stream produces fewer usable moments. A backlog should give you breathing room, not pressure you into a publishing commitment you can’t maintain.
- Choose repeatable publishing days. Put actual release days on the calendar rather than keeping a vague intention to post regularly.
- Maintain a buffer. Prepare the next publishing cycle before the current queue runs out.
- Separate production from publication. A productive editing session doesn’t require an immediate burst of uploads.
For a useful planning companion, Narrareach’s scheduling workflow for writers offers a written-content perspective on organizing a publishing routine. Apply that calendar discipline to clips, while keeping your creative review specific to video.
Use this video alongside your calendar planning.
If you repeatedly miss planned releases, lower the commitment before adding more automation. Viewers encounter the posts you publish, not the ambitious schedule you intended to keep.
Measure Scheduled Shorts With Engaged Views
Views and engaged views answer different questions. Views describe playback starts and replays; engaged views help you assess whether viewers chose to continue watching.
Beginning March 31, 2025, Shorts views count whenever a Short starts or replays, with no minimum watch-time requirement, while the previous view concept remains in Analytics as Engaged views, according to YouTube’s Shorts documentation.
That distinction matters when you compare scheduled releases. A large playback total doesn’t, by itself, show that people stayed for the clip or found it compelling.
Shorts metrics and what each one tells you
| Metric | Where to read it | What it tells you |
|---|---|---|
| Views (starts and replays) | Content tab in YouTube Studio | Broad reach; counts every start or replay |
| Engaged views | Analytics | Viewers who chose to keep watching |
| Average view duration | Analytics | How long viewers stay on average |
| Average percentage viewed | Analytics | How much of the Short viewers watch |
| Comments and remixes | Content tab in YouTube Studio | Interaction beyond watching |
| Subscriber conversion | Analytics | Whether a Short turns viewers into subscribers |
Read the metrics together
Consider a hypothetical comparison: clips published in different windows attract similar view totals, but the evening release has more engaged views and a higher average percentage viewed. That makes it a stronger candidate for further testing, not proof that evening is universally better.
Check length before interpreting retention. Average view duration gives useful context, while average percentage viewed helps you understand how much of each clip viewers watched. Neither should be read without considering what happened in the video.
Comments and remixes add another dimension. A clip can hold attention without encouraging a response, while a discussion-provoking moment may generate interaction for reasons that don’t translate into subscribers.
If you’re building a tracking sheet, record the video identifier, title, topic and scheduled window alongside the results. Vid Kraken’s guide to an API for YouTube video details is useful context for organizing video metadata, but public video details shouldn’t be confused with private channel analytics.
Judge a scheduled Short by engaged views and retention. Treat raw views as a broad reach signal, not a complete verdict on quality.
Use the same metric definitions and elapsed observation period for every comparison. Otherwise, you’re comparing different stages of performance rather than different publishing choices.
Find Your Best Publish Windows With a Controlled Test
There isn’t a universal posting hour that can rescue a clip your audience doesn’t want. YouTube’s explanation of Shorts discovery describes recommendations in terms of individual relevance and performance signals, including viewer choice, average view duration, average percentage viewed and satisfaction.
Start in YouTube Studio → Analytics → Audience and inspect when your viewers are online. Use that report to nominate candidate windows, while considering audience geography and whether holidays or regional routines make a particular period unusual.
The report gives you a starting hypothesis. It doesn’t prove that the busiest-looking window will deliver the strongest results.
Change the window, not the whole clip strategy
Controlled time-slot test matrix
| Variable | Action | Reason |
|---|---|---|
| Topic | Hold constant | Keeps audience interest comparable across slots |
| Edit style and captions | Hold constant | Stops creative changes from passing as timing effects |
| Duration range | Hold constant | Prevents length from skewing retention |
| Posting frequency | Hold constant | Keeps overall cadence from distorting results |
| Release window | Rotate across candidate slots | The variable being tested |
| Measurement period | Hold at consistent early and later checkpoints | Makes results comparable between posts |
For example, you might select two or three candidate slots for a hypothetical test, then rotate comparable gameplay highlights between them. Don’t put every dramatic comeback in the evening and every slow setup clip in the morning. You’d be testing content selection, not timing.
Keep a brief creative label beside each release: topic, opening style, caption treatment and approximate length category. This helps you notice when a supposedly comparable batch contains very different clips.
A documented social media auto-posting workflow can help organize the release process. The queue should execute your experiment, not decide which result counts as a win.
Keep only repeatable winners
Compare engaged views, average percentage viewed and subscriber outcomes across comparable releases. If you change the hook and the release window together, you can’t confidently attribute an improvement to either change.
A better-performing clip isn’t automatically evidence of a better posting time.
Retain a window only when it performs well across repeated, reasonably comparable posts. Keep a convenient, sustainable slot if the results are inconclusive. False precision is less useful than a publishing routine you can maintain while collecting better evidence.
Fix Scheduled Shorts That Underperform
Judging a scheduled Short by starts alone is the easiest way to make the wrong fix. Before moving its release window, look at what viewers did after playback began.
Scheduled Short symptoms, causes and fixes
| Symptom | Likely cause | Fix |
|---|---|---|
| Many starts, few engaged views | Weak opening seconds | Rework the opening and retest in the same slot |
| Strong result on one post only | Chance variation or several variables changed | Repeat the slot test with more comparable posts |
| Good slot, weak overall reach | Possible topic or hook mismatch | Test another topic while keeping the slot |
| Queue published at the wrong hour | Wrong time zone in the schedule | Recheck the time zone in Studio before leaving the queue |
| Results drop after a few weeks | Possible irregular cadence | Restore a sustainable cadence and check other changes |
Treat these as diagnostic hypotheses, not automatic explanations. Low reach doesn’t prove a topic mismatch, and a disappointing batch doesn’t prove that your cadence caused it.
YouTube’s Shorts Analytics guidance supports reviewing performance using native metrics. A practical review rhythm is 24 hours and 7 days, using consistent metric definitions rather than reacting whenever you happen to open the dashboard.
Fix the weakest variable first
When viewers don’t continue watching, inspect the opening before blaming the calendar. Stream clips often begin with context that made sense during the broadcast but doesn’t help someone encountering the moment cold.
Trim unnecessary setup, move the relevant action forward, and make the premise understandable without requiring knowledge of the full stream. The guide to making YouTube Shorts can help you review the creative work separately from the scheduling settings.
If retention looks healthy but distribution remains weak, test another topic or opening premise while preserving the release window. Changing the topic, captions, length and timing together may produce a better result, but it won’t tell you which change helped.
Keep slots that repeatedly support stronger engaged-view and retention results, while continuing occasional experiments. Recommendation outcomes vary by viewer, so a useful slot is a working choice, not a permanent guarantee.
Pick the weakest variable in your last batch and change only that in the next comparable release.
Set Up Your Next Two Weeks of Shorts
Treat your next two weeks as a small, hypothetical publishing experiment, not a deadline for discovering a permanent best time. A manageable batch is enough to establish a reliable workflow and identify what needs another test.
Prepare the batch and review dates
- Choose candidate windows. Use the Audience report to select plausible release periods, then write down why you chose them.
- Queue comparable Shorts. For example, schedule four clips across two windows, giving each window similar material. Complete the Visibility settings and verify every saved entry under Content.
- Log publication and review dates. Put the release details and matching early and later review checkpoints in your calendar.
- Record the same outcomes. Capture engaged views, average percentage viewed and subscriber outcomes, plus a short note about each clip’s topic and opening.
For a broader planning framework, FindClout’s 30-day native content calendar can help organize the next batch. Keep the calendar realistic rather than expanding it because empty dates are available.
If preparing the clips is the bottleneck, review your AI content repurposing workflow separately from the publication test. Don’t let a change in clip selection become another timing variable.
At the end of the trial, make a specific decision: keep the stronger candidate window, or collect more evidence if the results are mixed. Allow later releases to reach their full review checkpoint before declaring a winner, then begin the next batch with only a single deliberate change.
StreamGen turns Twitch highlights into vertical clips and lets you schedule a publishing queue across YouTube Shorts, TikTok and Instagram Reels from the same workspace. Visit StreamGen to prepare your next batch, set its release times and keep publishing while you focus on your next stream.
More blog posts