You’ve got a pile of YouTube moments saved, a rough idea for a compilation, and the nagging worry that the whole thing could get muted, claimed, or buried after you export it. That’s the right worry to have. How to make a video with YouTube clips starts with rights and workflow, not transitions, because a beautiful edit still fails if the footage can’t survive Content ID or if the format doesn’t fit the feed.
Table of Contents
- Why Most YouTube Clip Videos Fail Before They Start
- Clearing Rights on the Clips You Want to Use
- Sourcing and Organizing Your Raw Clips
- Cutting and Arranging a Clip Video That Holds Attention
- Reframing for Vertical and Adding Captions
- Export Settings and Publishing for Maximum Reach
- Troubleshooting Common Clip Video Problems and Final Tips
Why Most YouTube Clip Videos Fail Before They Start
Most clip compilations don’t die in the timeline. They die because the editor treated YouTube like a free stock library and skipped the boring checks that decide whether the upload stays alive after publish. That mistake shows up later as a claim, a mute, or a video that people never finish because the structure never earned the watch-through.
YouTube’s scale makes this more than a theory. Shorts launched globally in 2021, and YouTube reported 15 billion daily views at launch, later citing 30 billion daily views in 2021, 50 billion in 2022, 70 billion by 2024, and roughly 200 billion daily views by 2026 in third-party summaries, which is why clip-based repurposing became so central for creators (ShortsIntel statistics). On a surface that large, rights mistakes and weak pacing get exposed fast.
The real failure point is upstream
A clip video is a rights project first and an editing project second. If the source isn’t reusable, or if the clips don’t have enough transformation to stand on their own, the edit may never matter. YouTube’s own copyright environment is heavily automated, so the practical risk isn’t just a human review, it’s matching audiovisual fingerprints at scale.
Practical rule: don’t open your editor until you know why each clip is allowed to be there.
The second failure point is structure. A compilation that feels like a random dump of highlights usually loses attention after the first few moments because it never gives the viewer a reason to keep moving. The fix is not “more clips,” it’s a tighter selection with a deliberate arc, which means the sourcing decision and the edit decision are linked from the start.
Clearing Rights on the Clips You Want to Use
The fastest way to lose a clip video is to assume that every YouTube upload can be reused because it’s public. Public does not mean reusable, and attribution alone doesn’t protect you from Content ID. YouTube’s copyright system is automated, and in 2025, over 99% of Content ID claims were generated by automated detection, while fewer than 0.6% of automated claims were disputed, versus over 1.4% for manual claims (YouTube Transparency Report). That’s why the safer workflow is to clear rights before you spend hours editing.
Start with the description and the channel page. Look for explicit reuse language, Creative Commons notices, or a statement that the creator allows clipping. If the video is music-heavy, treat it as high risk, because the underlying rights are often layered and a visible creator credit won’t solve that.
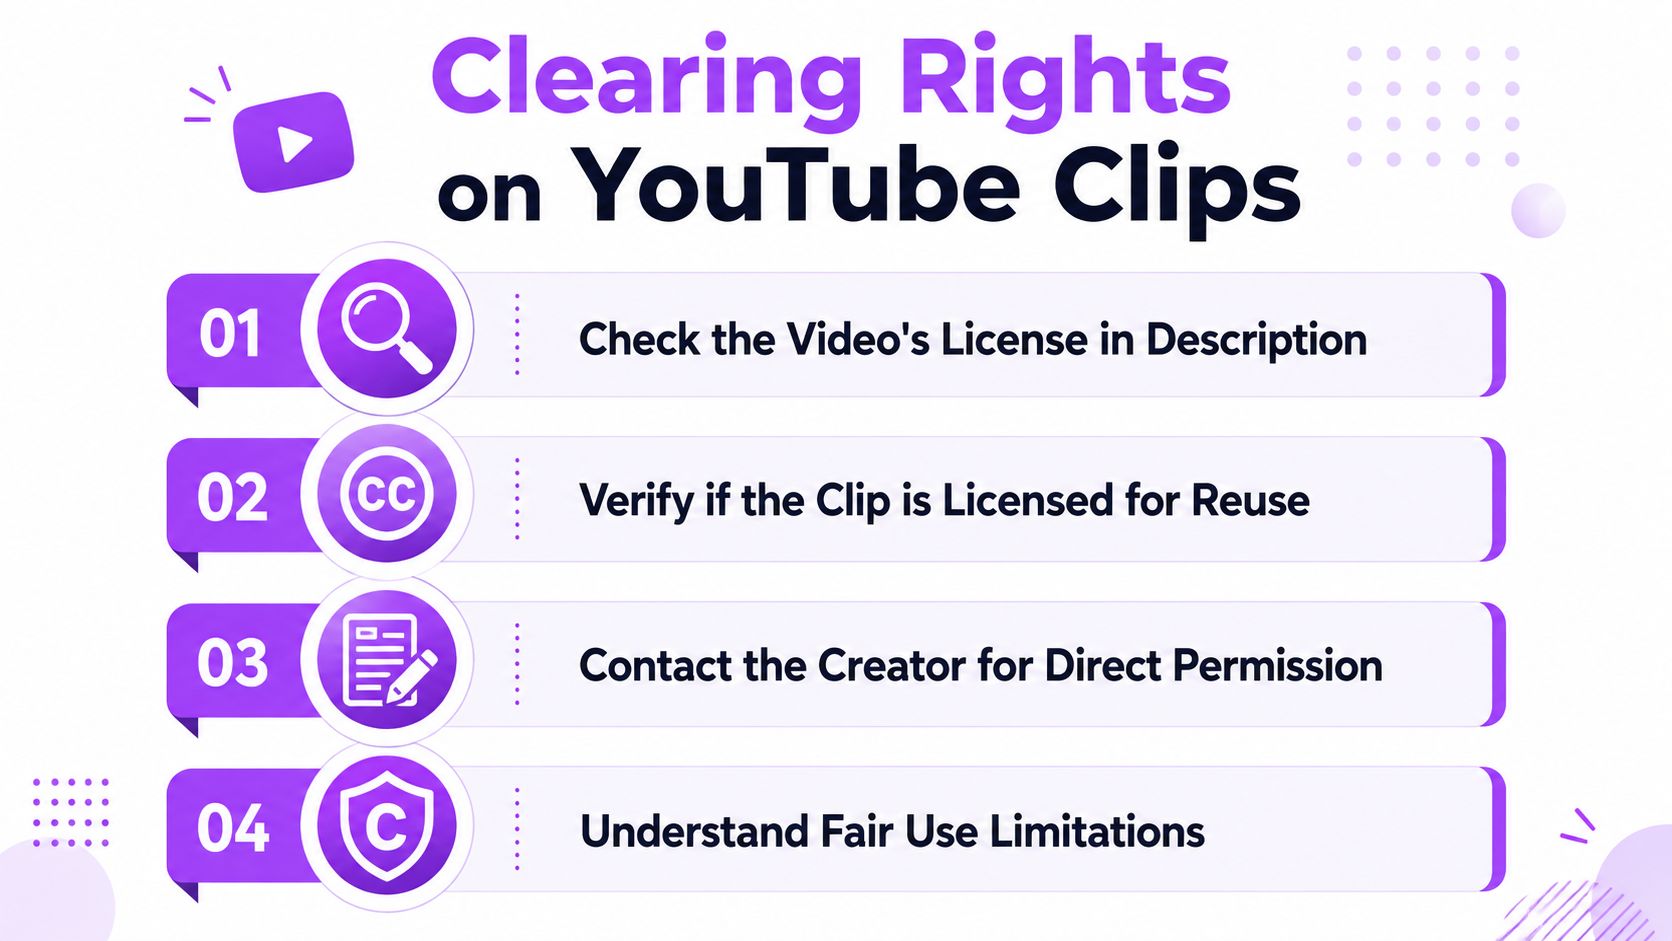
Minimum-clearance checklist
- Check the video’s license: Read the description and the channel’s About page before downloading anything.
- Verify reuse terms: Look for wording that clearly allows clipping, remixing, or redistribution.
- Save direct permission: If the license is unclear, message the creator and keep the reply.
- Log the fair-use case: Write down whether the clip is commentary, parody, criticism, or analysis, because YouTube’s fair use guidance says purpose, amount used, and transformation all matter, and commercial use is less likely to qualify than nonprofit education (YouTube fair use guidance).
The key trade-off is speed versus safety. If you’re racing to publish, permission-based clips and stock alternatives are usually cleaner than leaning on fair use alone, especially when you plan to monetize. A short rights log helps here, source URL, clip duration, intended use, and the transformation steps you made, so if a claim lands later, you’ve got evidence ready instead of guesswork.
A lot of creators only learn this after the upload is already live. By then, the edit is finished, the thumbnail is designed, and the claim arrives anyway. Front-load the clearance work and you’ll waste far less time on exports that never should have existed in the first place.
Sourcing and Organizing Your Raw Clips
Once the rights picture is clear, source with a single angle in mind. If you don’t know what the compilation is about in one sentence, you’ll save too much and use too little of it. Good clip sourcing is selective, not greedy.
The cleanest raw material usually comes from the original upload, not a repost. Pull the highest resolution available, because you can always compress later but you can’t recover detail that was never there. Leave a few seconds of padding on both ends so you can cut into the moment cleanly instead of forcing awkward hard starts and hard stops.
Organize before you edit. Put clips into folders by topic or creator, rename each file with the channel name, upload date, and a short content tag, and keep usage notes in the filename or a nearby text file. That way, the rights check stays attached to the media instead of living in a forgotten spreadsheet.
Clean organization saves more time than any transition preset ever will.
If you want a basic capture workflow reference, this guide to how to clip on YouTube is useful for the mechanical side of source collection, but the bigger win is discipline. Don’t build a folder full of “maybe” clips. Build a folder that already reflects the story you want the final video to tell.
A practical way to sort is by editorial value, not just by topic. One folder might hold the strongest reaction beats, another the most explanatory lines, and another the clips that only work as support. That separation makes it easier to assemble a rough cut without dragging in every file you liked while browsing.
Cutting and Arranging a Clip Video That Holds Attention
A clip video lives or dies on the rough cut. If the structure feels flat before polish, no amount of color grading or motion blur will rescue it. Start with rhythm, not effects, and let the sequence earn the viewer’s next click.
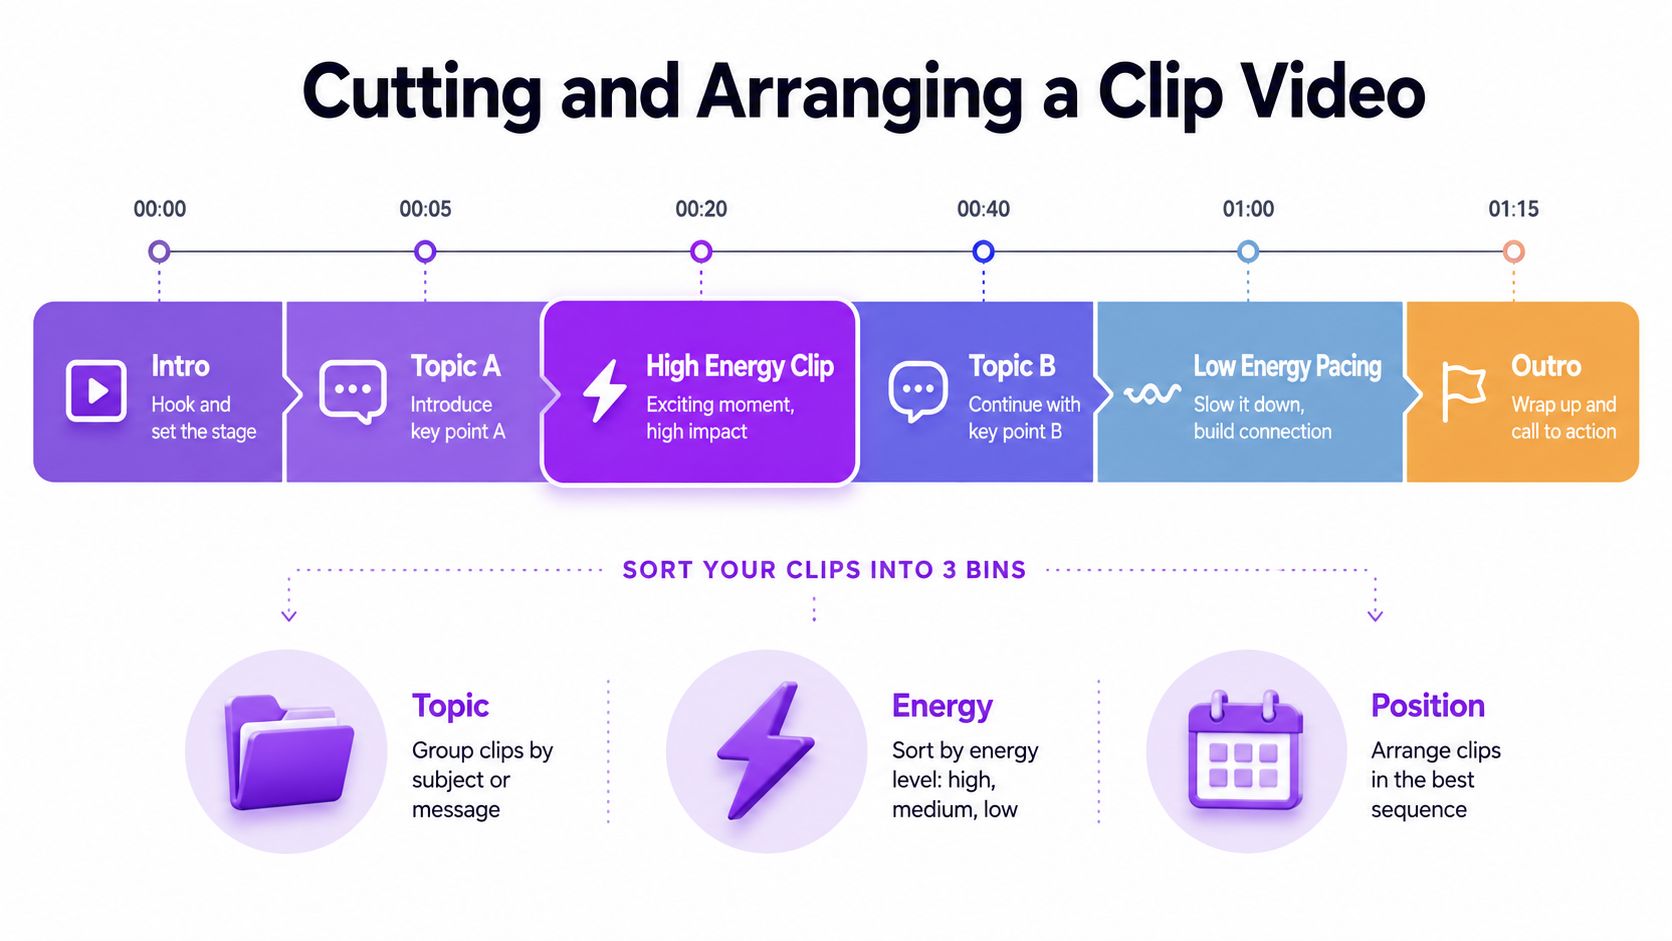
Build the rough cut first
Drop the clips into bins by topic, energy, and intended position in the sequence. Then place the strongest hook first, not the most explanatory setup. Viewers on Shorts and TikTok decide in seconds whether the video is worth their time, so opening with context usually loses them before they understand the point.
Cut aggressively around silence. Keep movement in the edit, and use B-roll, a title card, or a fast reaction shot whenever two unrelated moments need a reset. If a clip can’t carry itself, shorten it until it can, or move it to a supporting role.
Use pacing as a design choice
Individual moments often work best when they’re short and direct, unless the source beat needs more space. Cut on action where possible, and don’t let one speaker or one joke monopolize the whole sequence. A temporary music bed helps you feel whether the pace breathes or stumbles, even before you touch transitions.
If you’re using an AI-assisted workflow, a browser editor like AI video clipper can help surface the first pass faster, but the human job stays the same, decide what deserves to stay. The trap is turning a highlight reel into a string of equally weighted clips. That feels busy, but it doesn’t feel shaped.
Practical rule: if two adjacent clips say the same thing, one of them is probably wasting space.
The best rough cuts usually alternate intensity. One sharp moment, then a reset, then another sharper moment. That pattern keeps the viewer from settling into fatigue, which is exactly what happens when every clip is cut to the same length and no beat changes the tempo.
Reframing for Vertical and Adding Captions
A horizontal edit that looks fine on desktop can still die on a mobile feed. Shorts, TikTok, and Reels are built around vertical viewing, thumb-sized text, and constant UI overlays, so the frame has to be designed for that environment from the start. If the subject falls out of the safe area, the clip feels amateur even when the source footage is strong.
Use a 9:16 master alongside the 16:9 version. Reframe manually or with auto-reframe, then check every camera switch to make sure the subject stays centered. Leave headroom and lower-space buffer for platform controls, because text and interface elements will compete with your composition immediately.
Caption decisions that actually matter
Captions are not decoration. They carry the story when the viewer is on mute, which is common behavior in vertical feeds, and they also force you to notice where the edit is too loose. Burn in word-by-word captions, keep them high contrast, and place them in the lower third so they don’t fight the subject’s face.
| Decision | Recommended | Avoid |
|---|---|---|
| Framing | Track the active subject in 9:16 | Keeping the original 16:9 crop |
| Captions | Word-by-word, high contrast, lower third | Small subtitles pushed too high |
| Reframing | Manual fixes for camera switches | One static crop for the whole video |
| Readability | One or two emphasized keywords per beat | Dense blocks of text over the subject |
If the captions don’t make sense with the sound off, the cut needs work. That’s the fastest test I use before I export a vertical version. A vertical clip should still read cleanly when someone is scrolling with the volume muted, because that’s when your framing and text either do the job or expose the weak spots.
For a deeper technical walk-through, how to change video aspect ratio is a useful reference when you’re moving between formats. The main point is simple, though. Don’t let the crop be an afterthought, because the crop is part of the edit.
Export Settings and Publishing for Maximum Reach
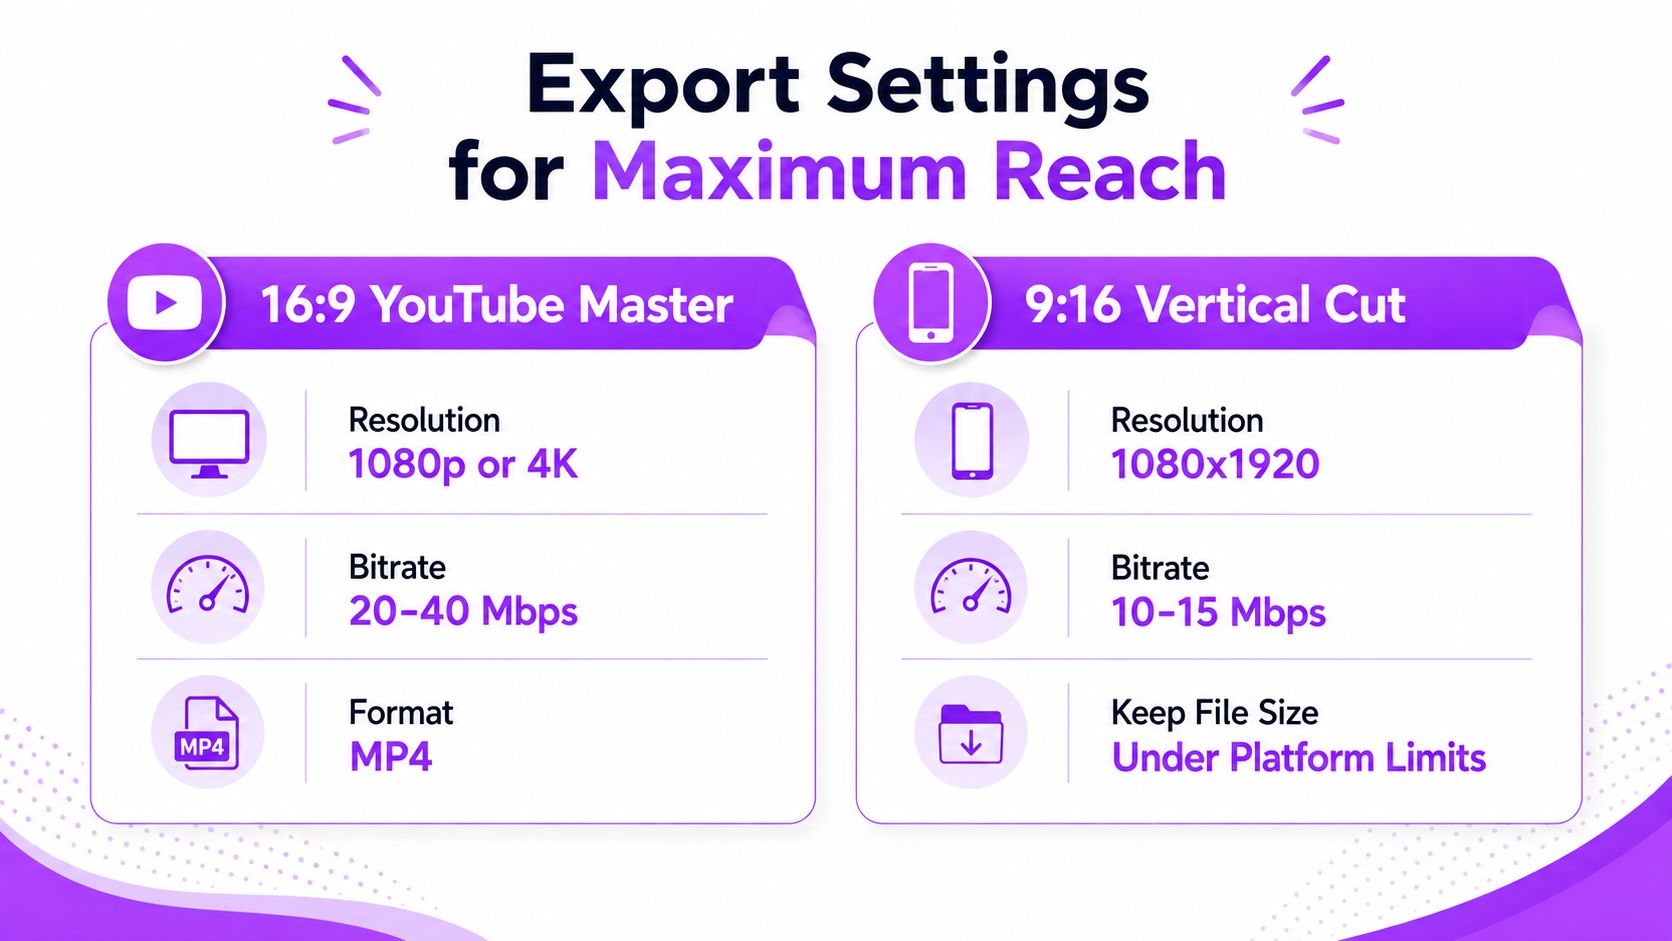
Once the cut holds up, export for the destination instead of using one file for everything. The 16:9 master can stay at 1080p or 4K with a high bitrate around 20 to 40 Mbps, while the 9:16 vertical version is typically exported at 1080x1920 with a bitrate in the 10 to 15 Mbps range to keep file size manageable. Use H.264 for broad compatibility, or H.265 if the host accepts it and your workflow supports it.
Publish like a package, not a file dump
Write a title that reflects actual search intent. A keyword-stuffed title feels robotic and weakens trust before anyone clicks. Make the thumbnail legible at a glance, with one clear focal point and enough contrast to survive tiny mobile previews.
If you need a clean caption file for uploads or reuse, subtitles with WhisperAI.com is a practical resource for generating SRTs and keeping subtitle files organized. That matters because caption format bugs can eat time after export, especially when you’re posting across multiple platforms.
Post the vertical cut natively to Shorts, Reels, and TikTok with platform-specific tweaks instead of one universal upload description. Keep a shared asset folder for intros, outros, and brand elements so the next compilation starts from a known base. Then watch retention graphs and compare which hooks, cuts, and pacing choices kept people watching long enough to matter.
YouTube’s own distribution has made Shorts a mainstream discovery surface, so the version you publish there deserves its own packaging. A strong export is part technical, part editorial, and part distribution strategy. If you treat it like a final checkpoint instead of a clerical step, you’ll make fewer fixes after the upload goes live.
Troubleshooting Common Clip Video Problems and Final Tips
The most common technical issue is audio drift. If source clips came from different sample rates or different capture chains, they can slowly separate from the picture, and the problem becomes obvious only after export. Fix that before you spend time on effects, because a clean visual cut still feels broken when the sound slips.
Color can clash too. Mixing clips shot under different lighting conditions often creates a video that looks patched together, so use adjustment layers or simple correction passes to bring the footage into the same family. Pacing is the other silent killer, especially when every source clip is cut to its original length instead of to the internal beat the final video needs.
Watch for post-publish surprises
Content ID doesn’t always show up immediately. A claim can land later, and when it does, it’s usually better to have the rights log ready than to start reconstructing the edit from memory. Also keep in mind that a claim and a strike are not the same thing, and rights holders can review monetization without necessarily removing the video, depending on the situation and platform response.
Caption glitches, blurred vertical edges, and export bottlenecks are usually workflow problems, not creative problems. If the frame looks soft after reframing, check whether the source resolution was too low for the crop. If captions break on upload, simplify the styling before blaming the platform.
Practical rule: if a clip feels questionable before export, it’ll feel worse after a claim.
The cleanest final checklist is simple. Clear rights, organize the sources, cut for attention, reframe for mobile, and export for the platform you’re posting to. That sequence is what keeps a clip video from getting muted, blocked, or ignored after all the editing work is done.
StreamGen handles the parts of this workflow that usually eat the most time, finding highlights, reframing them for vertical formats, and posting them to TikTok, YouTube Shorts, and Instagram Reels from one workspace. If you’re turning streams or long videos into clip-driven posts, visit StreamGen and see how a single tool can cover clipping, editing, and distribution without bouncing between half a dozen apps.
More blog posts