You finish a four-hour Twitch broadcast, promise yourself you’ll download it on Sunday, and move on to the next task. By Sunday, the VOD is gone. I learned that lesson the unhelpful way, after assuming Twitch would keep a broadcast around long enough for me to turn the good parts into clips. It doesn’t.
The reliable answer to how to save your Twitch stream isn’t one download button. It’s a layered workflow: enable Twitch’s temporary archive, record locally while you’re live, scan the saved file for moments worth keeping, then edit and distribute those moments before the source disappears.
Table of Contents
- The Twitch Retention Clock and Why Saving Is Urgent
- Turning On VOD Storage and Highlights in Twitch
- Recording Locally as a Parallel Safety Net
- Scanning a Saved VOD Like a Signal Stream
- Choosing Between Manual Editing and AI Clip Tools
- Exporting, Reposting, and Handing Off to Your Editor
- A Post-Broadcast Checklist You Can Reuse Every Stream
The Twitch Retention Clock and Why Saving Is Urgent
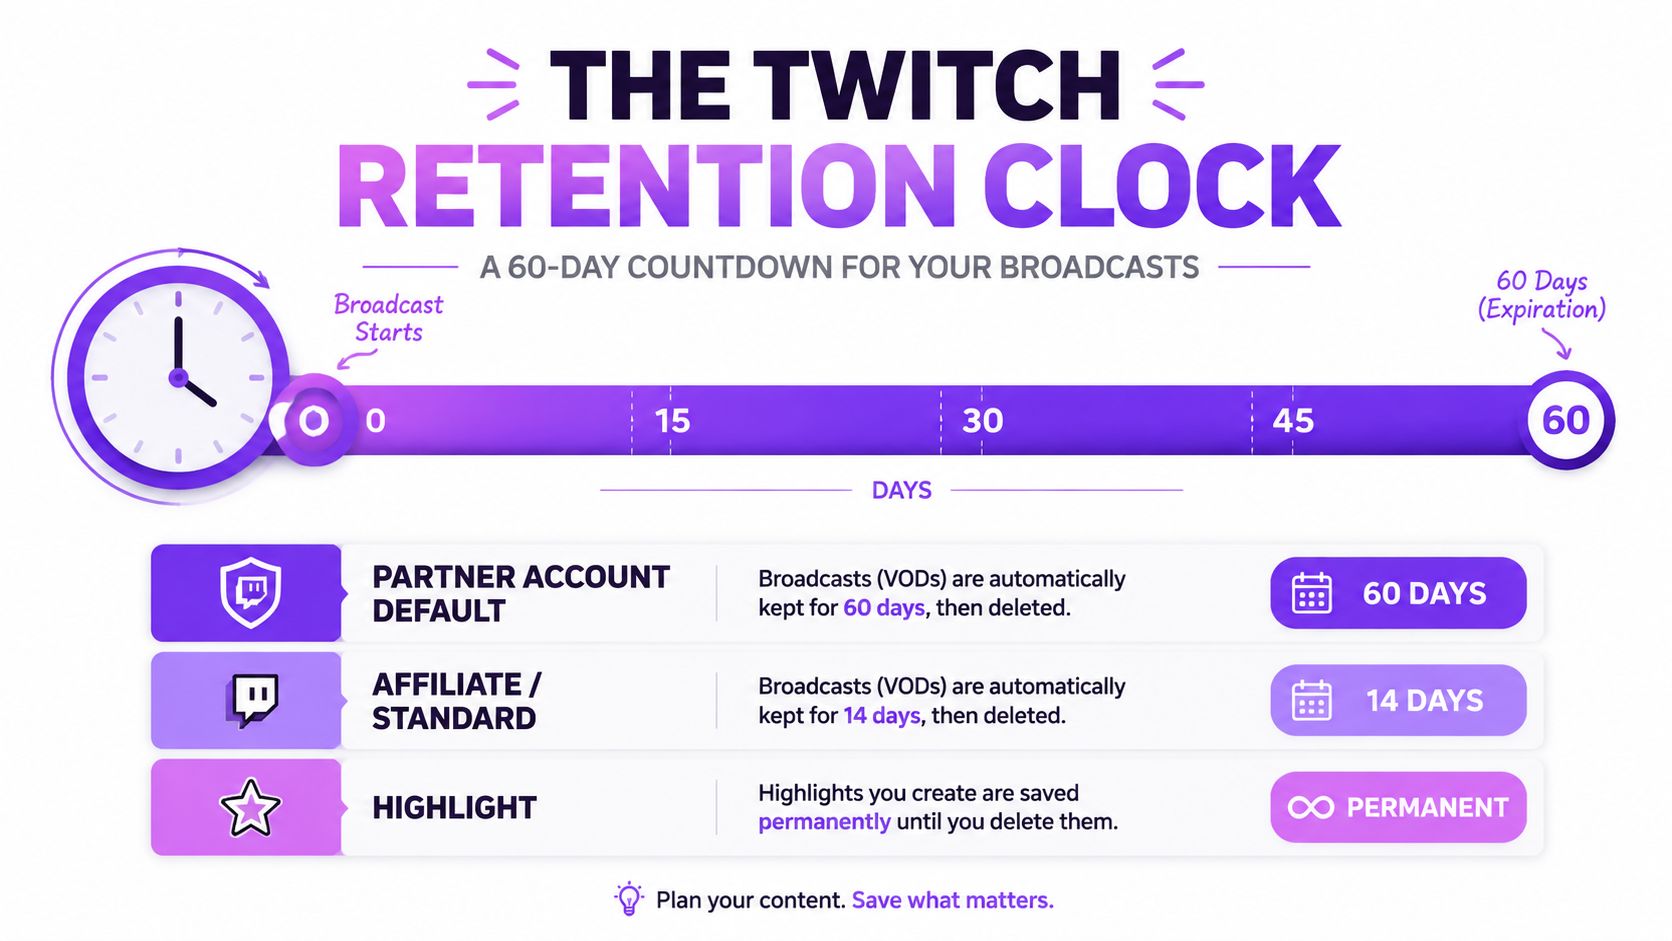
You finish a Tuesday broadcast, plan to turn the best moment into a Thursday TikTok, and leave the VOD for later. Twitch may delete that source before you return to it. Non-affiliate channels retain VODs for about 7 days, Affiliates for 14 days, and Partners, Prime, or Turbo-linked accounts for up to 60 days, according to this overview of Twitch VOD retention. A broadcast can disappear automatically within a week.
That clock makes saving part of the broadcast, not an occasional cleanup task. A longer window gives you more time, but it still is not a permanent archive. Once Twitch removes the broadcast from its servers, Twitch’s native VOD tools cannot recover it. Keep another copy before the deadline reaches the file.
Where to watch the countdown
Open Creator Dashboard, Video Producer and inspect the saved broadcast. Twitch displays expiry information with the past broadcast, and the highlighted past-broadcast thumbnail can provide another reminder. Check both instead of trusting a calendar note or memory.
Clips have a separate limitation. Non-Partner viewers may see a clip expire after a 48-hour window, so clipping does not preserve the underlying broadcast. Deleting a highlight from the dashboard does not create a local archive either. If the footage matters, download it or capture it outside Twitch.
Practical rule: Treat the VOD as a temporary working copy, not your master library.
The risk is large enough to justify a layered workflow. One analysis estimated that about 2 million hours of stream content are deleted each day as VODs expire under Twitch’s storage rules, as discussed in this analysis of Twitch’s VOD retention policy. Use Twitch storage for short-term access, local capture for protection, organized review for selection, and a publishing queue for the clips worth keeping.
Turning On VOD Storage and Highlights in Twitch
Set Twitch to save the broadcast before you start streaming. Open Creator Dashboard, go to Settings, select Channel and Videos, then find VOD Settings. Enable Store Past Broadcasts.
That setting controls the first copy in your workflow. If it is off, Twitch creates no VOD to download, review, clip, or share with an editor. Enable Always Publish VODs too, if the option appears and automatic publication fits your channel.
Highlights require a separate decision. A saved past broadcast is Twitch’s temporary recording. A highlight is a selected or edited portion preserved through Twitch’s tools. Creating a highlight does not turn the full broadcast into a permanent archive, so keep another copy outside Twitch for footage you may reuse.
Confirm the retention tier you actually have
Check the retention period attached to your account instead of assuming you receive the longest window. Twitch generally keeps broadcasts for about 7 days for non-affiliate channels, 14 days for Affiliates, and up to 60 days for Partners, Prime, or Turbo-linked accounts. Even the longest default period is temporary. The Twitch VOD retention reference outlines these tiers and what they mean for post-stream work.
After changing the settings, run a short test broadcast. End it, allow processing to finish, then open Video Producer. Confirm that the test appears as a saved broadcast and shows an expiry timestamp. If it is missing or marked deleted, correct the setting before a session worth keeping.
Use Twitch storage for quick access and immediate clipping. Build the durable archive with a second copy captured during the stream.
Recording Locally as a Parallel Safety Net
Local recording is the safety net Twitch can’t remove. Keep Twitch VOD storage enabled for convenient access, but treat the file written to your own machine as the master copy. The VOD is a mirror that helps with quick clipping and remote access.
OBS Studio is the usual starting point. Record to MKV so a crash is less likely to invalidate the entire file, then use OBS’s built-in remux process to create an MP4 when your editor requires it. A hardware capture card can write a console or camera feed directly to an SSD, while an NDI or virtual-camera recorder can preserve a secondary reaction view.
| Local Recording Setup Options Compared | Best For | Failure Mode |
|---|---|---|
| OBS Studio recording | PC gameplay, overlays, webcam, and mixed scenes | A full disk, unstable drive, or poorly configured recording path can interrupt capture |
| Hardware capture card writing to an SSD | Console gameplay and dedicated video pipelines | Cable, card, driver, or SSD failure can interrupt the source |
| NDI or virtual-camera recorder | Secondary camera, reaction feed, or alternate scene | Network congestion or a disconnected source can create gaps |
File hygiene keeps the backup usable
Write recordings to a dedicated scratch SSD with at least 200GB free, and enable file splitting at 2GB so one damaged segment doesn’t take the whole session with it. Back up raw files to a second drive or cloud bucket the same day. A local file that exists only on a machine used for streaming is still a single point of failure.
Keep audio at 48kHz, and set the recording bitrate to match the streaming bitrate so your editing workflow doesn’t introduce avoidable sync or quality problems. Before you go live, record a short test with gameplay, microphone, alerts, and facecam, then inspect the resulting file.
If you’re also recording interviews, lessons, or other non-gaming material, a guide to top lecture recording apps can help you compare capture workflows outside OBS. For the broader hardware and storage setup, use this budget streaming setup guide as a practical reference.
Scanning a Saved VOD Like a Signal Stream
A saved VOD is not a finished video. It is a long signal with peaks, resets, menus, quiet stretches, and moments whose meaning depends on the surrounding audio and chat. The faster you reduce that signal to a shortlist, the more likely the broadcast becomes usable content before the retention window closes.
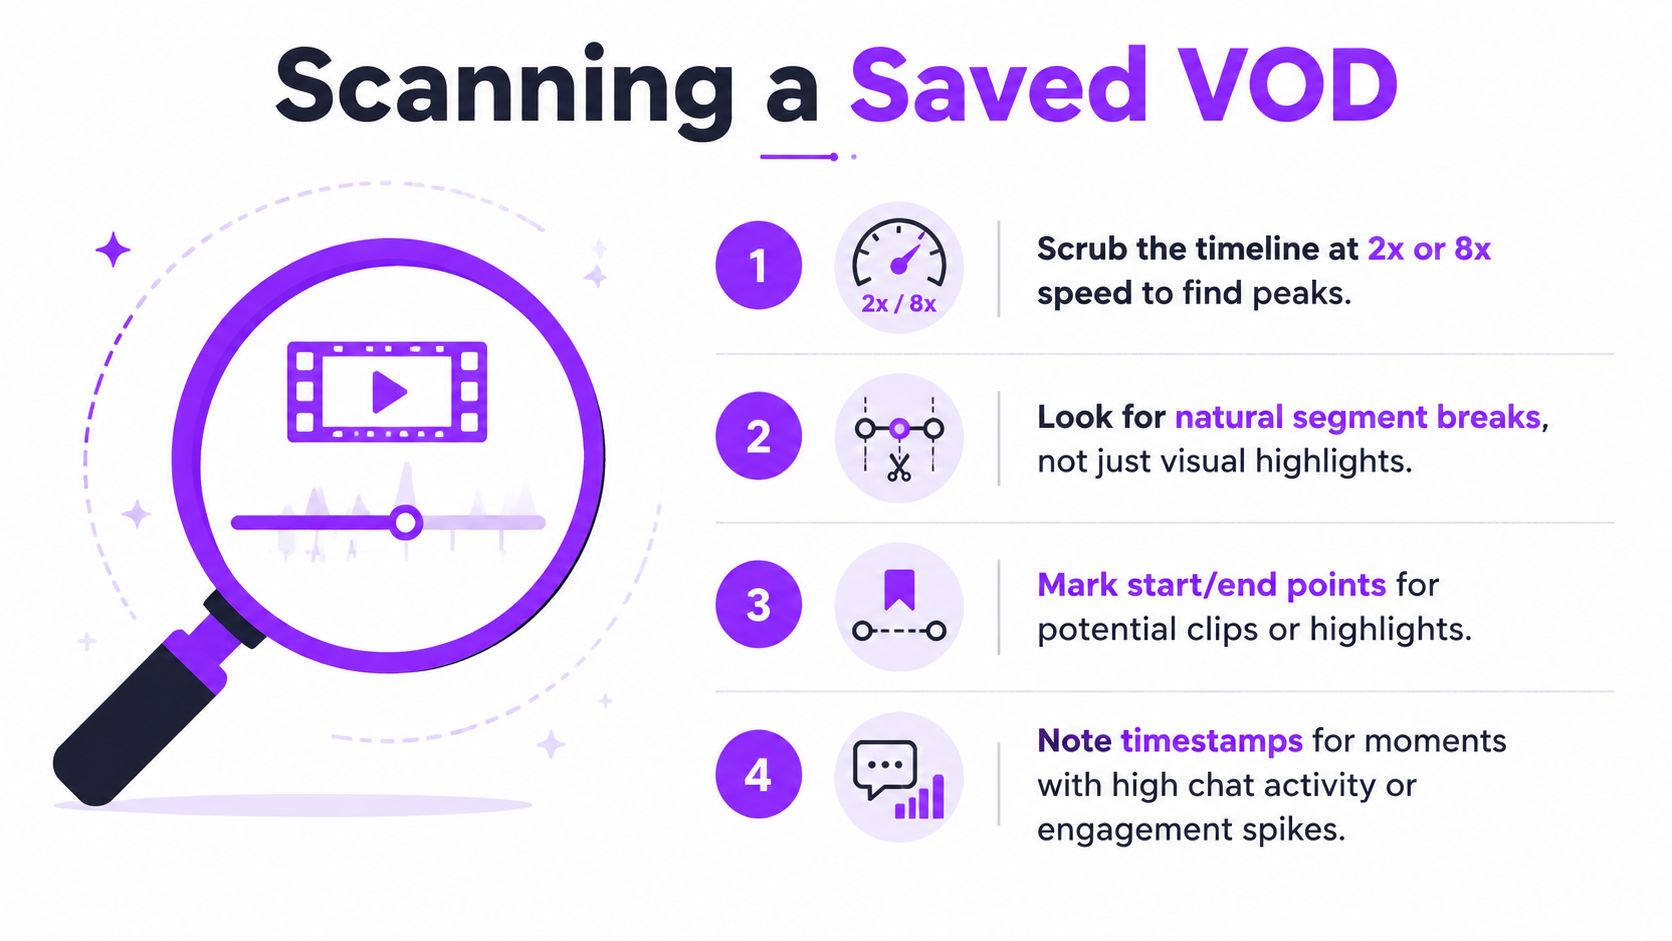
Start with triage. Open the local recording or saved VOD and scrub at 2× or 8× playback. Listen for changes in energy and watch for visual shifts. A laugh, shout, sudden silence, raid, boss attempt, overtime round, fail, camera reaction, or emotional beat can reveal a candidate without forcing you to watch every minute at normal speed.
Build a shortlist before opening the editor
Use a text file, spreadsheet, or marker track. Log the start and end timestamps, a brief description, and a category such as funny, hype, emotional, or instructional. Chat activity can help confirm that something happened, but it is not proof that the moment works as a clip. Fast chat may only reflect viewers waiting through a menu or reset.
A practical first pass:
- Scan for peaks: Scrub until voice, gameplay, or chat activity changes sharply.
- Mark natural boundaries: Keep enough setup to make the payoff clear, then cut away from the long explanation.
- Rank replay potential: Put the strongest candidates first rather than editing in chronological order.
- Reject dead weight: Skip loading screens, scoreboard pauses, repeated explanations, and resets unless they provide context the viewer needs.
Keep a working shortlist of 6 to 12 candidates, with each one roughly 15 to 90 seconds before the final edit. Another workflow recommends creating 10 to 20 candidates from a 3-hour stream, followed by a tighter pass around each payoff. Those ranges serve different stream lengths and review habits. The VOD scanning workflow offers a useful reference for organizing that first pass.
Highlight work has two separate jobs: finding promising moments and setting accurate boundaries. A timestamp only identifies an event. The finished clip still needs an in-point before the action and an out-point after the reaction, a distinction examined in this highlight-extraction paper.
A dedicated Twitch clip finder can narrow the search by surfacing likely moments. Review every suggestion yourself. A stranger should understand why the moment matters without relying on your regular viewers’ context.
Choosing Between Manual Editing and AI Clip Tools
Manual editing gives you control over every frame. Premiere Pro, DaVinci Resolve, and CapCut let you tighten the opening, shape the audio, write context captions, remove sensitive words, and keep the visual style consistent with your channel. The trade-off is time. A long, talk-heavy VOD can consume the entire editing window before you find a usable moment.
AI clip tools reverse that trade-off. Services such as Opus Clip and Eklipse can ingest a saved VOD, transcribe speech, flag likely moments, and generate vertical candidates. That workflow fits long broadcasts, frequent posting, and channels where short-form work keeps getting postponed because editing takes longer than going live.
| Manual Editing vs AI Clip Tools | Manual Editing (Premiere, DaVinci, CapCut) | AI Clip Tools (Opus, Eklipse, etc.) |
|---|---|---|
| Speed | Slower, especially during VOD review | Fast first-pass candidate generation |
| Control | Frame-accurate cuts, custom captions, detailed audio work | Strong starting point, but boundaries and captions need review |
| Best match | Cinematic moments, niche jokes, produced segments | Long broadcasts, frequent posting, talk-heavy streams |
| Main risk | You spend the whole editing window on one clip | The tool misses context or selects a moment that regular viewers understand better than new viewers |
A hybrid workflow usually handles the trade-off best. Let AI scan the VOD and produce candidates, then manually recut the strongest two or three. Check every caption, remove unnecessary setup, and watch each draft on a phone before publishing. AI finds possibilities. You still decide whether a stranger can follow the moment.
For creators comparing workflows to create shorts from your stream, match the tool to the bottleneck. If finding moments takes too long, automation saves the first pass. If strong candidates already exist but feel rough, manual editing improves the result faster.
Clip length should follow the moment, not a fixed template. Skill-play clips often work best when they stay tight, reactions can carry a little more room, and story-driven moments need enough setup for the payoff to make sense. The streamer clip engagement benchmark offers directional checks for completion, early viewing, and follower conversion. Use those figures to review your cuts, not to force every highlight into the same duration.
Exporting, Reposting, and Handing Off to Your Editor
Saving the source is only half the job. A raw VOD sitting on a drive doesn’t create discovery, and a technically correct clip can still fail if the first seconds contain a menu, a long pause, or context only your regulars understand.
Export two masters when a moment has genuine reuse potential. The first is a 1080×1920 vertical file at 30 or 60 fps, with captions baked in for direct social uploads. The second is a clean 1080p or 1440p horizontal file without captions, so an editor can reframe it later for a longer YouTube segment, sponsor integration, or a different series format.
Make the vertical file native to the feed
Use 9:16, H.264 video, high bitrate, and AAC audio. Keep platform limits in mind: TikTok under 60 seconds, YouTube Shorts under 90 seconds, and Instagram Reels under 90 seconds. These export limits and recommendations are summarized in the streamer clip engagement benchmark, which should be consulted once during setup rather than treated as a reason to force every idea into the same duration.
Upload natively to each platform instead of recycling a visible watermark. Use a Twitch clip share link when the purpose is to send viewers back to the source, not when you’re trying to make the exported video feel native in another feed.
Give editors a complete handoff
A clean handoff needs more than “make this funny.” Put the horizontal master, timestamped shortlist, and a one-paragraph brief in a shared folder. Name files with the stream date, moment slug, and platform target, such as 2026-09-02_ranked-overtime_vertical.
Include the intended hook, any words that need censoring, the preferred caption style, and the final destination. An editor using Premiere Pro or DaVinci Resolve can then work without searching through a chat thread or asking which version contains the clean audio.
For larger archives, a Twitch VOD editor can help prepare timeline-ready projects for those professional editing applications. StreamGen can also find moments from Twitch VODs, reframe them for vertical video, add captions, and schedule direct distribution to TikTok, YouTube Shorts, and Instagram Reels. Use it as one layer in the pipeline, while keeping the original local recording separate.
A Post-Broadcast Checklist You Can Reuse Every Stream
A seven-day VOD window can disappear before you have reviewed a long broadcast. Run the same save routine while the session is still fresh, so one missed setting or failed recording does not erase the source.
- Confirm Twitch storage: Check that Store Past Broadcasts and Highlights remain enabled. A missing VOD may be an archive-setting issue, not an editing problem.
- Verify the local capture: Open the OBS or hardware-recorder file and check that it covers the full session, keeps the intended resolution, and has working audio.
- Rename and archive: Move the recording into a dated folder with a descriptive filename. Keep the clean master separate from exports.
- Scan for candidates: Review the saved VOD at accelerated playback. Mark moments with a clear setup, action, and payoff, along with any sections that need context.
- Edit the strongest cuts: Choose manual editing, AI assistance, or a hybrid process. Remove dead air, check captions, and review the crop before export.
- Export and queue: Create vertical versions, retain the clean master, and schedule suitable cuts for TikTok, YouTube Shorts, and Instagram Reels.
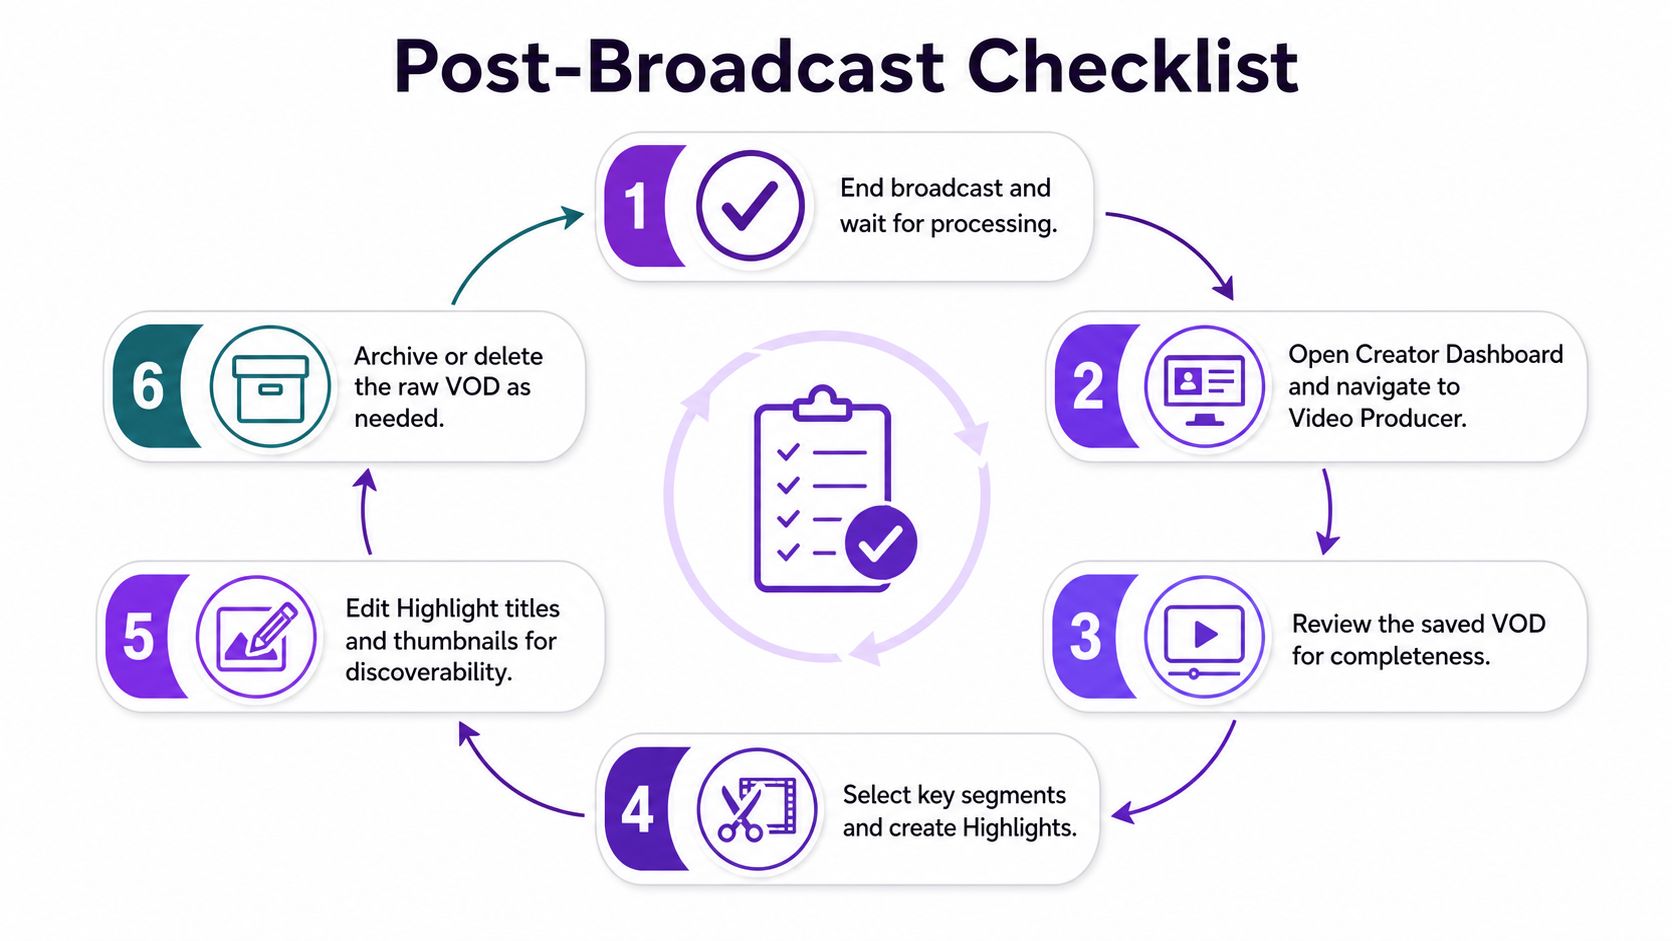
The order matters because each check catches a different failure. Twitch storage confirms the archive setting. The local-file check catches an incomplete or silent capture. Naming keeps the master searchable, while scanning and editing turn preservation into usable content.
If the broadcast runs for 8 hours a day, an unpreserved workflow can leave about 56 hours of potential source material each week exposed to Twitch’s retention rules. Check available disk space before the next session, and confirm the recorder has enough room to finish the broadcast.
StreamGen can turn saved Twitch broadcasts into ranked clips, edited vertical videos, and scheduled posts across TikTok, YouTube Shorts, and Instagram Reels. Visit StreamGen to connect the saving routine with a clipping and publishing queue before the next VOD reaches its expiry date.
More blog posts